Apps on Jobbit can send email, such as sign-up confirmations, receipts and notifications, without a mail service of your own. Jobbit gives each app the keys for it as managed variables. By default the mail goes from a Jobbit address. To send it from your own domain, set up the Email sender in the app’s Domain tab.

Send from your domain

1

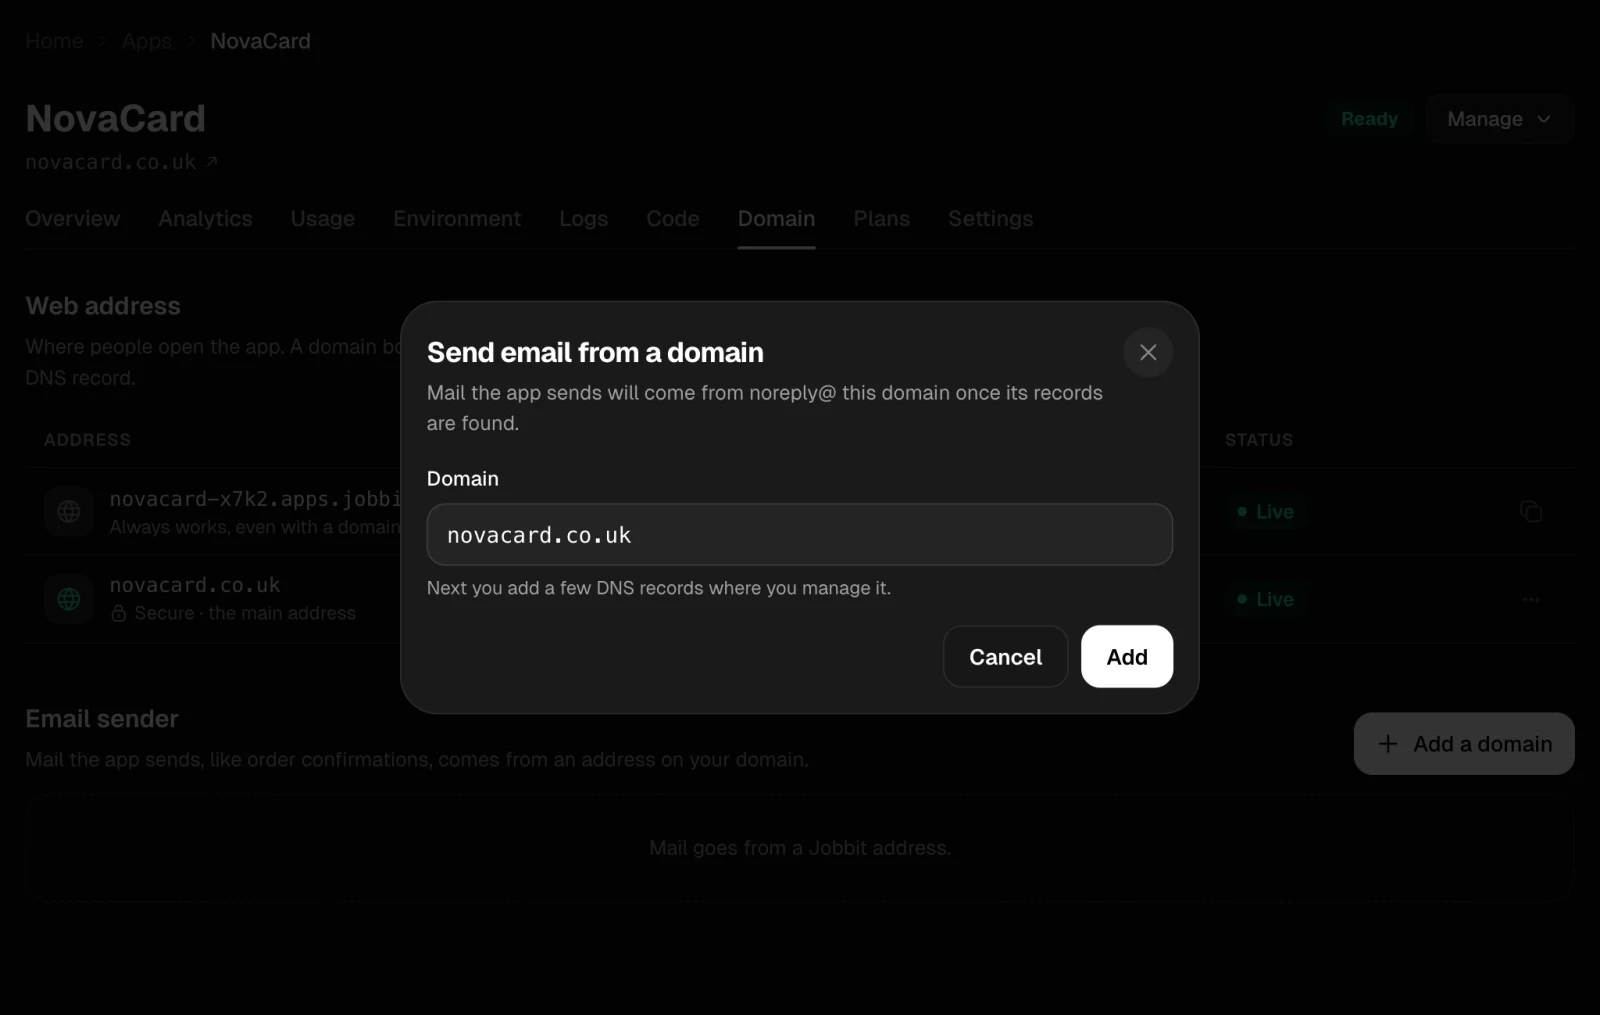
Add the domain

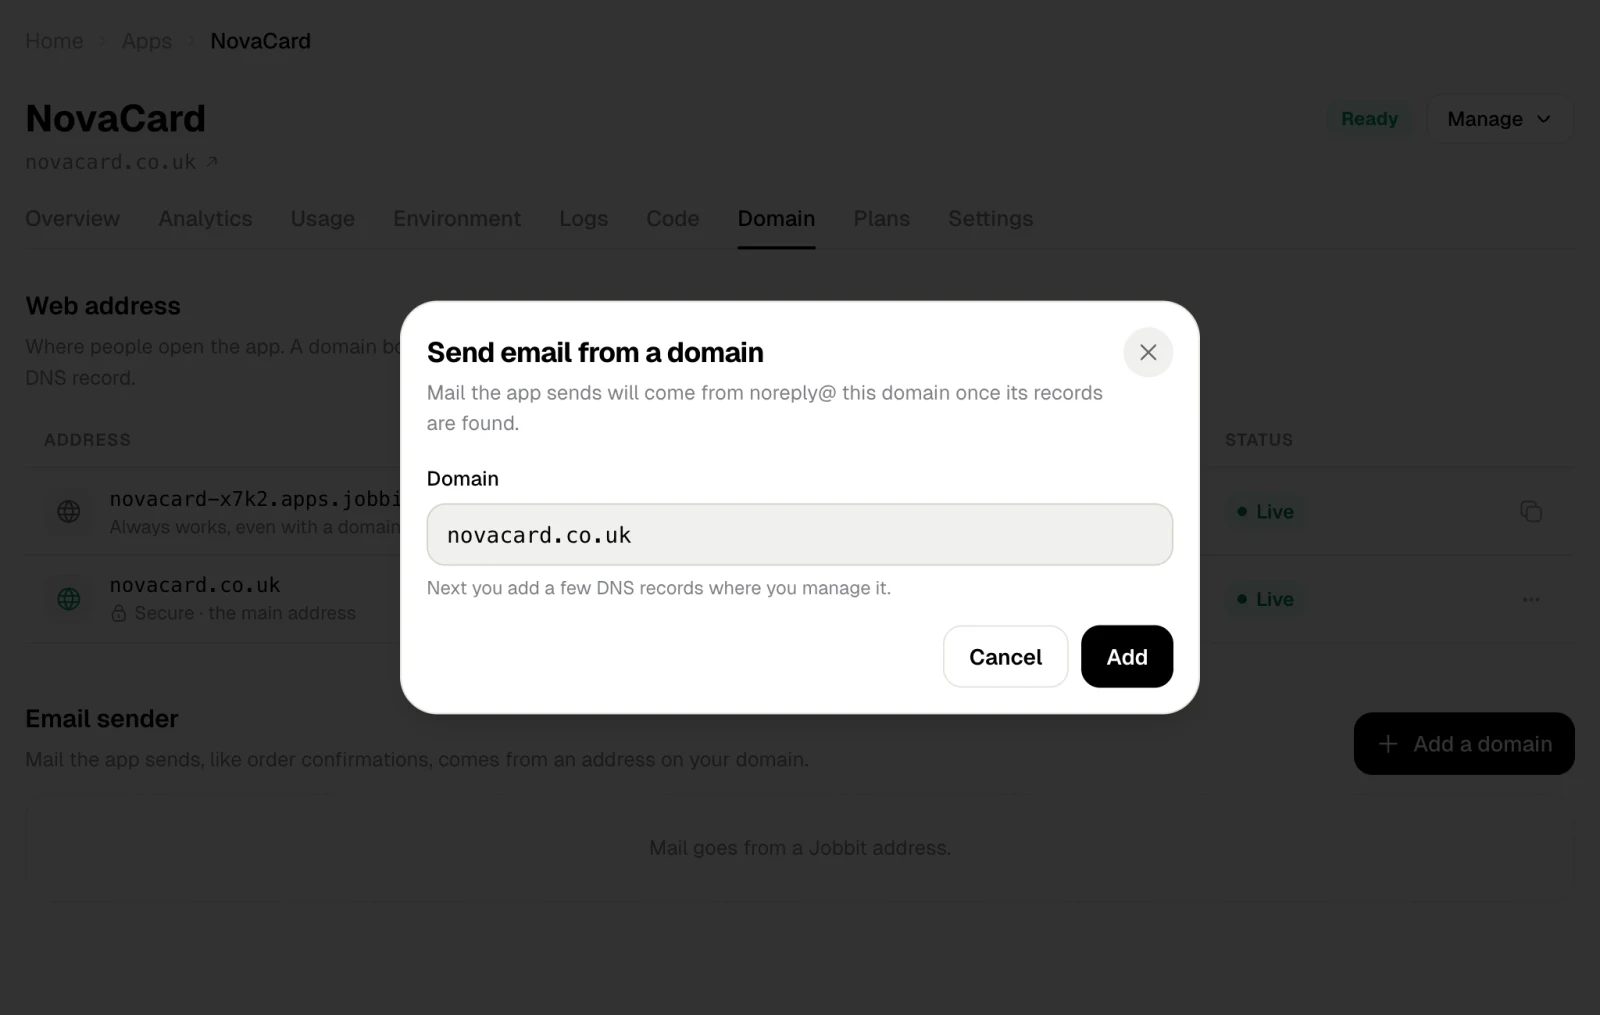
Under Email sender, choose Add a domain and type the domain, such as novacard.co.uk. The app’s mail will come from noreply@ that domain.
2

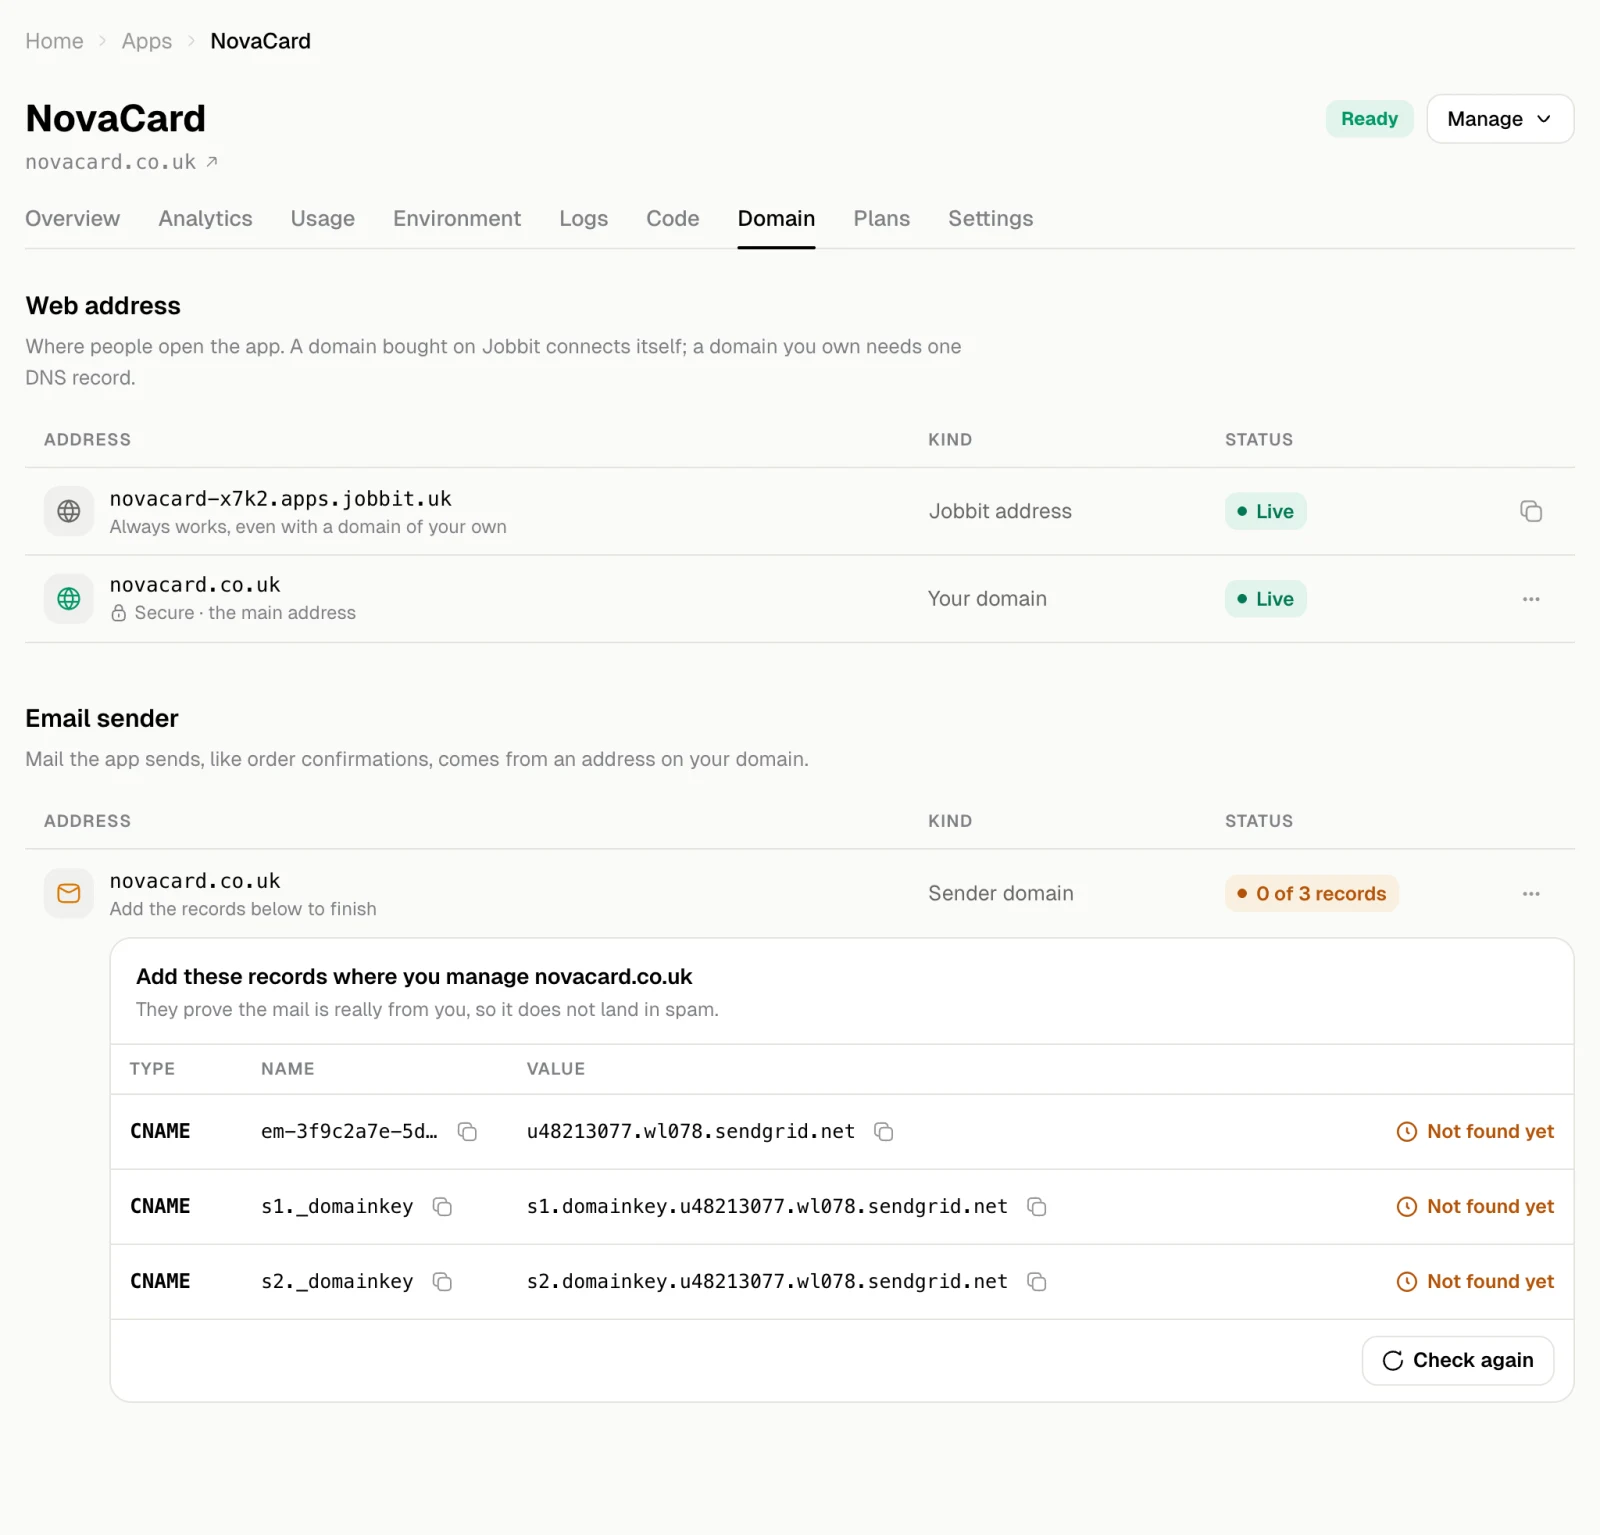
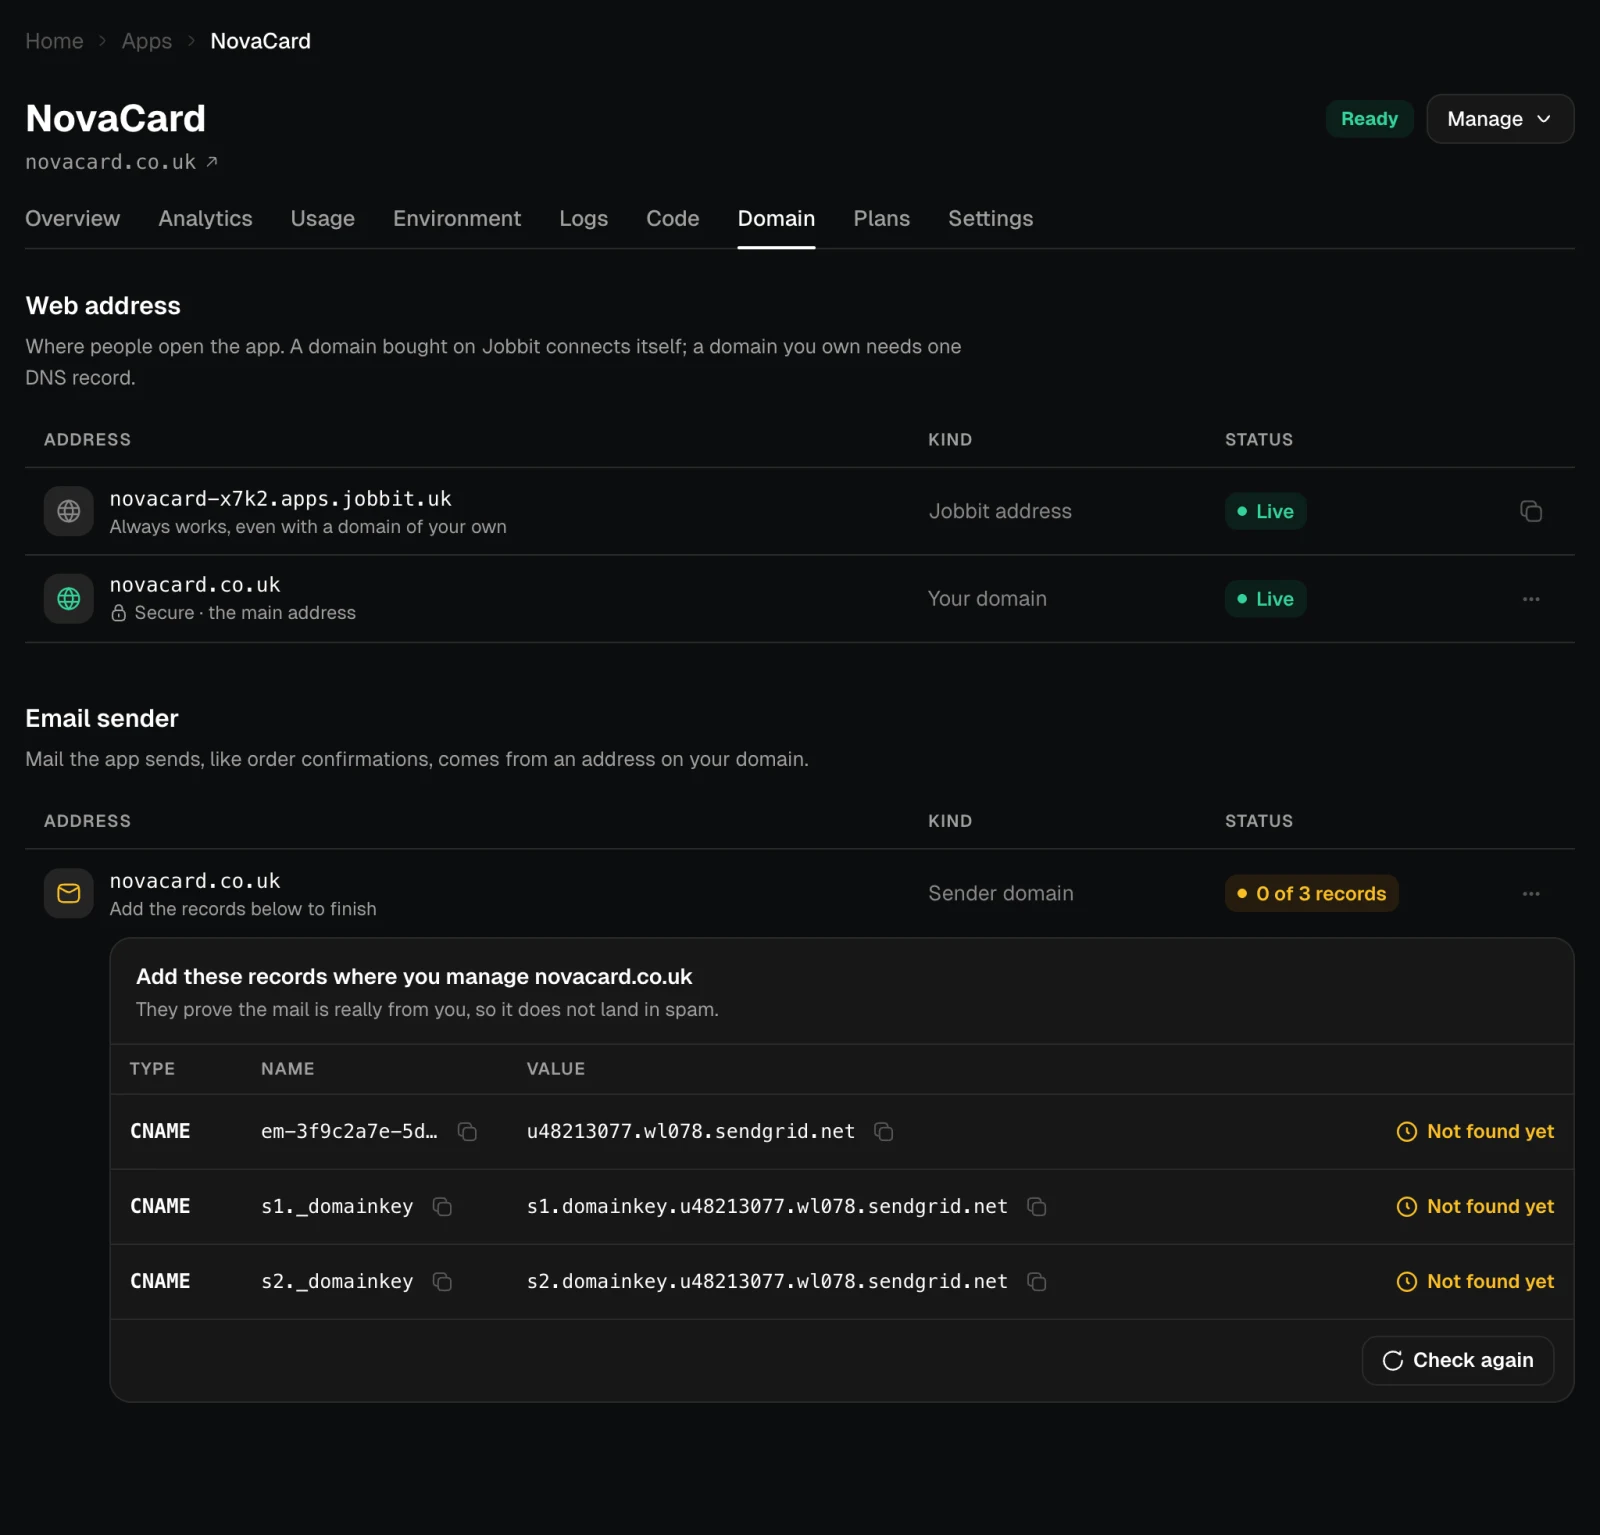
Add three DNS records

Jobbit shows three CNAME records. Add them where you manage the domain. They prove the mail is really from you, so it does not land in spam.
3

Check them

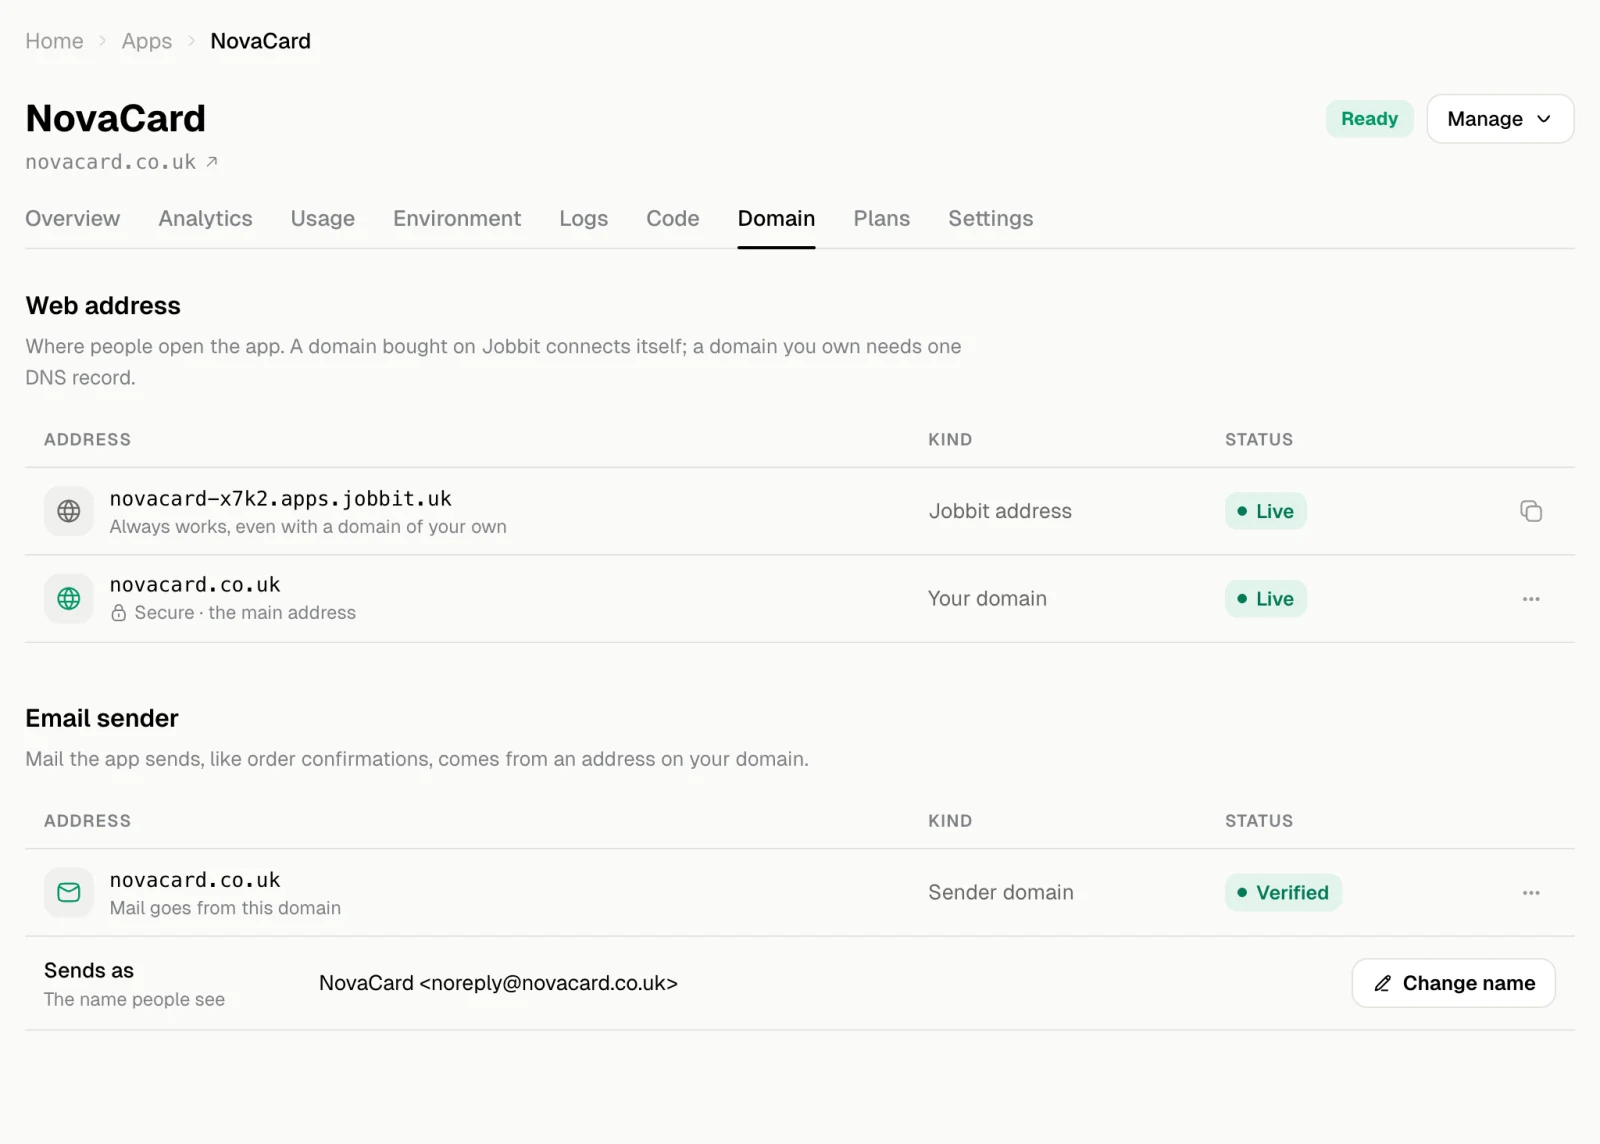
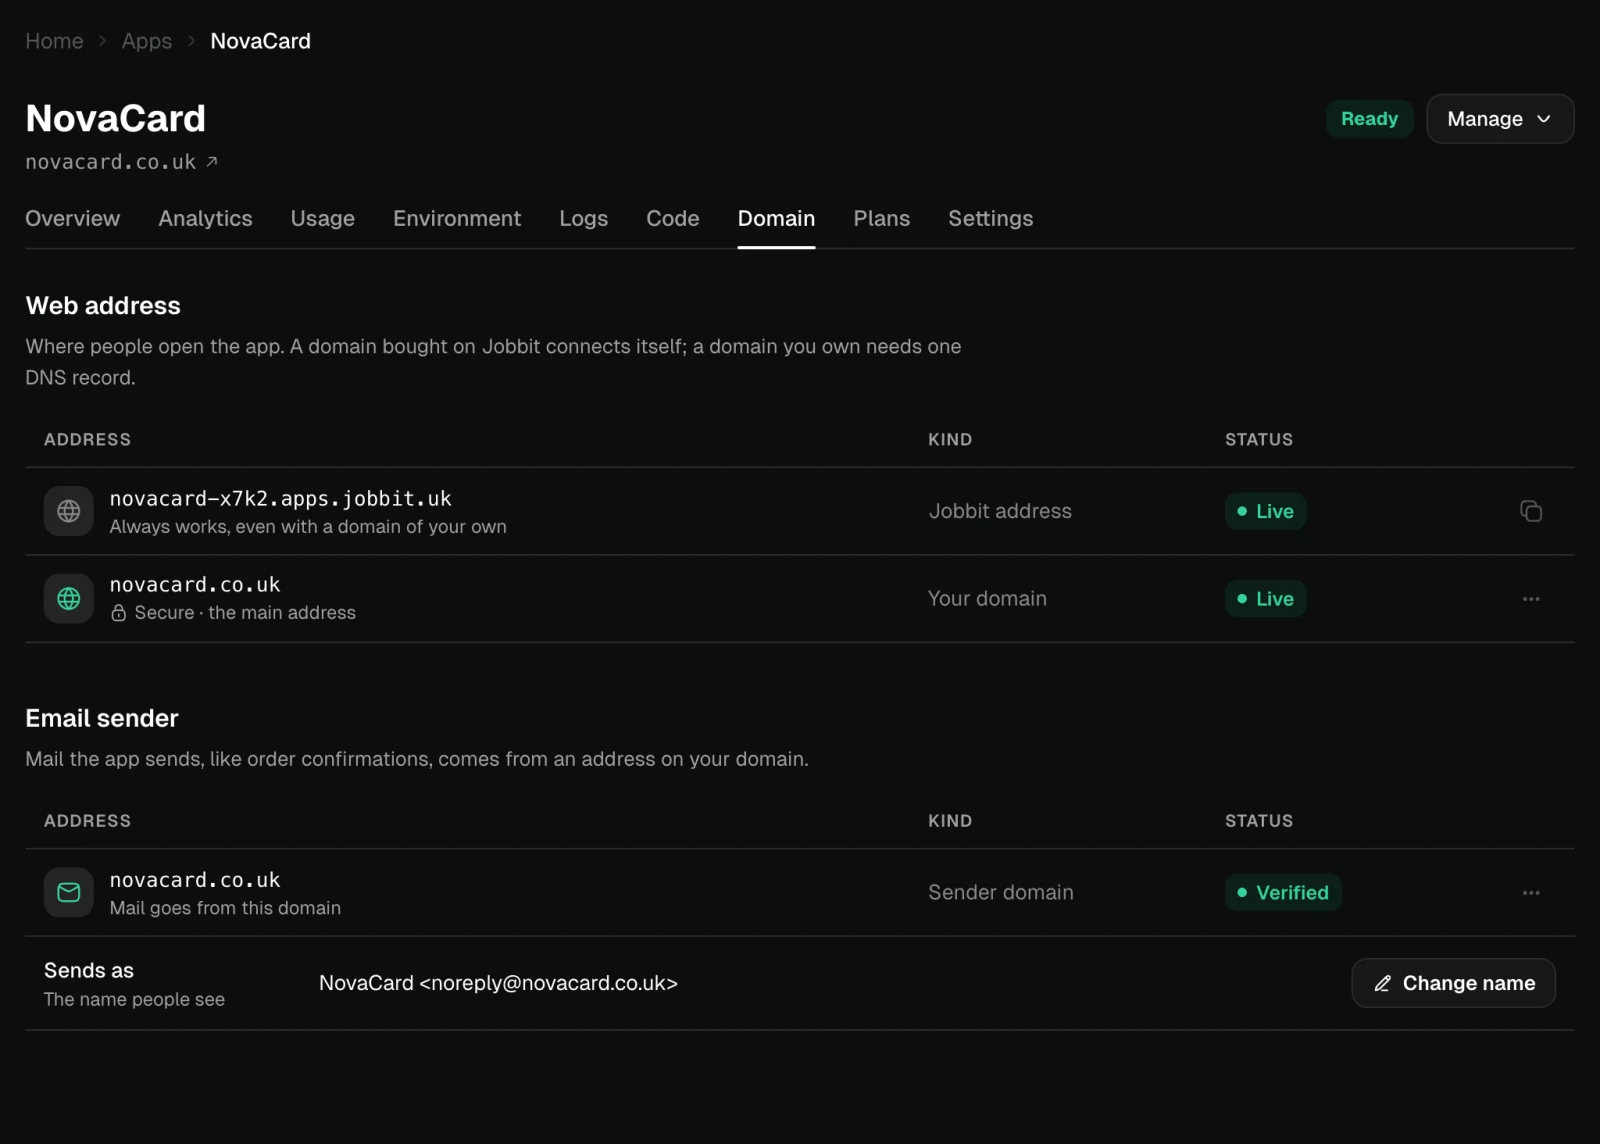
Records show up within minutes, sometimes up to a day. Check again looks for them and counts how many are found. When all three are there, the domain is Verified and the app’s mail goes from it.
4

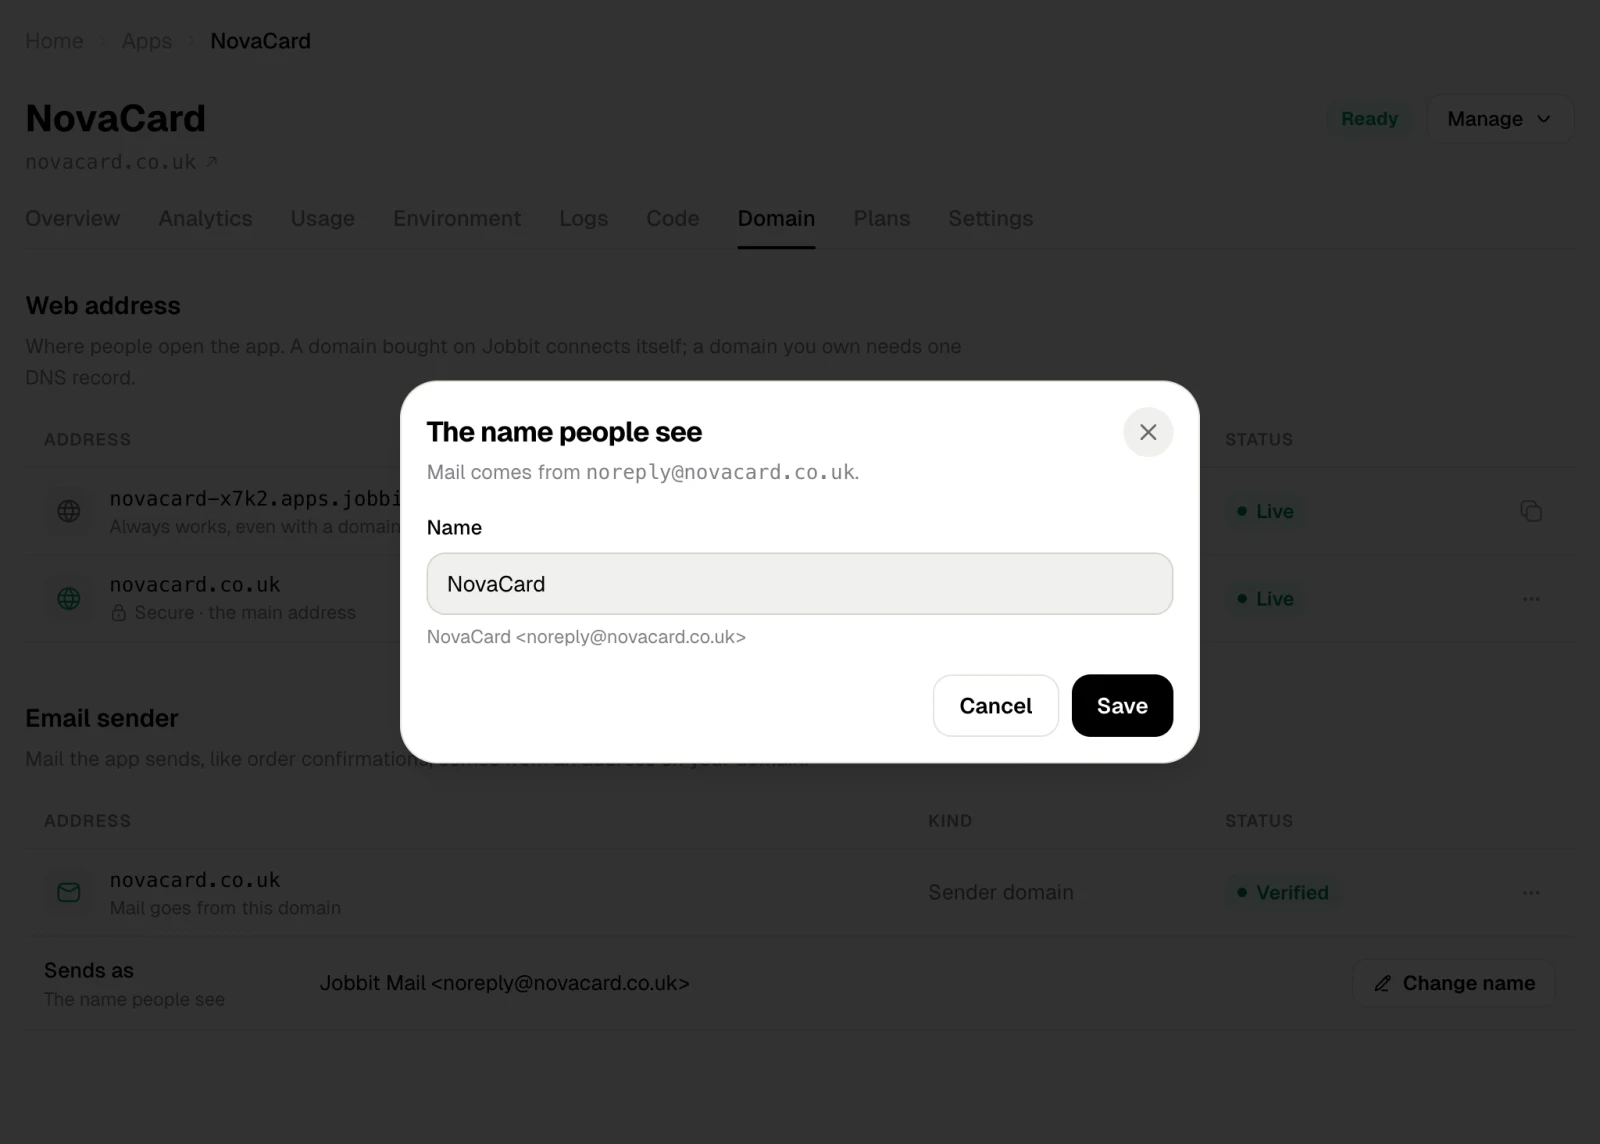
Set the name people see

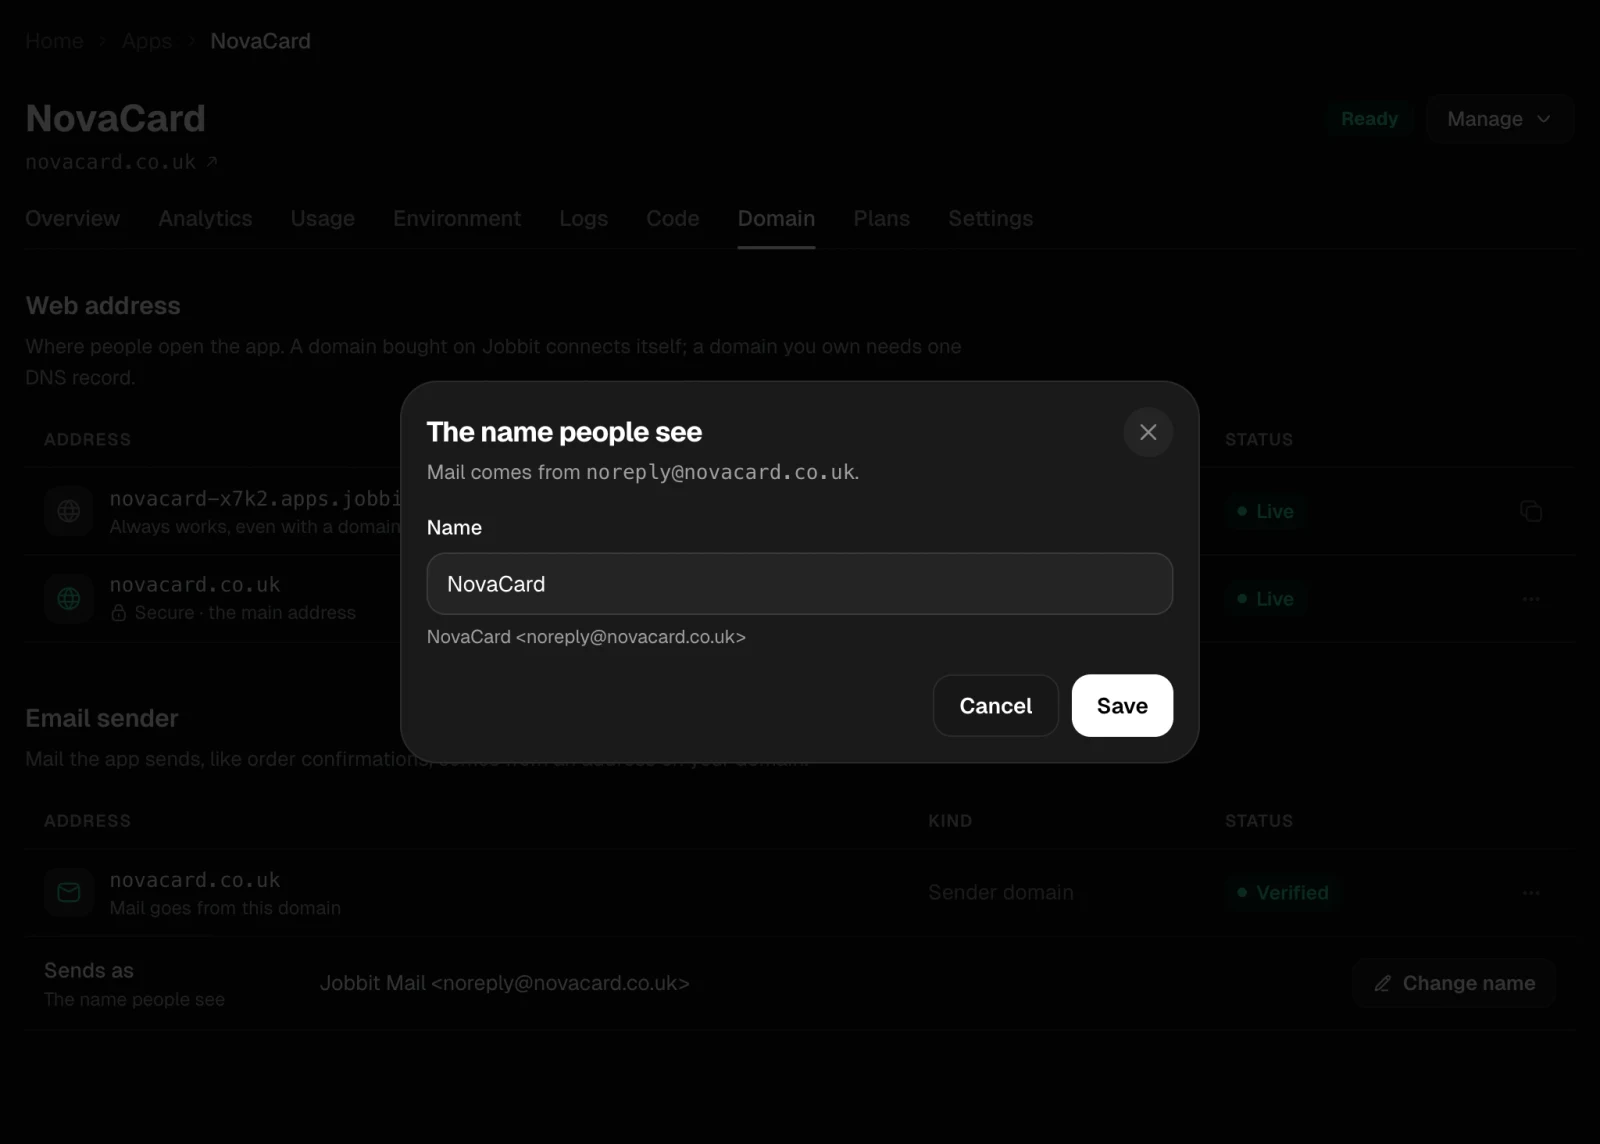
Choose Change name next to Sends as and type the name that appears in inboxes, such as your brand.
The Send email from a domain dialog, light themeThe Send email from a domain dialog, dark theme
Three CNAME records waiting to be found, light themeThree CNAME records waiting to be found, dark theme
The dialog to set the sender name, light themeThe dialog to set the sender name, dark theme
The verified sender domain with its sender name, light themeThe verified sender domain with its sender name, dark theme
You can set up the mail domain before or after you connect a domain to the app. For a domain bought on Jobbit, Jobbit adds the three records itself; the tab lists them until they are found.

Stop sending from the domain

Open the sender domain’s ⋯ menu and remove it. The app’s mail goes from the Jobbit address again.

Limits

How many emails your apps may send a day depends on the plan; see Plans. Each recipient gets at most 20 emails an hour from an app. Usage shows how many the app sent today and how many bounced.